The Easiest Full Circle Skirt Pattern You’ll Ever Sew (With FREE Printable!)

Cut a full circle skirt pattern long and you instantly have a glam, ultra-comfortable maxi skirt that makes you feel like a princess every time you turn around. Cut the length of the skirt short and you immediately have a flirty, sexy little skirt perfect for your next holiday party. Its the ultimate party skirt, with maximum twirl-ability.
Learn How To Sew A Skirt w/ This DIY Maxi Skirt w/ Side Slit
Right now I’m loving the look of a short circle skirt with tights and heeled boots. It’s boho, easy to style, creates the illusion of a smaller waist, AND lengthens your legs all at the same time. Make it EXTRA BOHO by also making some of my intentional stone bracelets to go with it. From a stylist perspective though, a circle skirt is the perfect body-flattering piece for any style!
The absolute best part about this full perfect circle skirt pattern is just how easy it is to make. You can whip out a circle skirt in less time than it takes you to find a matching pair of shoes in your closet…. depending on how messy your house is. Or maybe that’s just me…..

A Perfect Circle Skirt
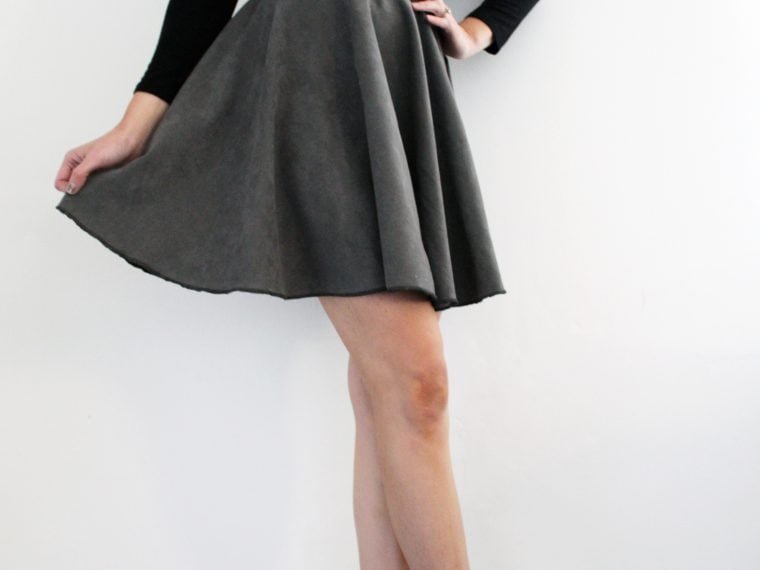
Today I’m so excited to walk you through a step by step tutorial on exactly how to make a circle skirt in whatever fabric choice you choose. For today, I’ll be using a buttery faux suede since I love the texture and unexpected drape of the thicker fabric. I’ve been absolutely loving all the suede miniskirts of the season and thought a circle skirt would give a flirty silhouette to one of this seasons biggest trends.

This project works great in whatever fabric you like but if you are using a sheer fabric, be sure to cut a lining piece of fabric as well.
In all honesty this may be the easiest type of skirt to create. I’ve even created a totally FREE simple printable pattern for you to make the process that much easier!
What You’ll Need for This Full Circle Skirt Sewing Pattern
Skip the endless craft store runs. Here’s your complete list of circle skirt supplies—most of which you might already have if you’ve done even one DIY sewing project before.
My supply lists are shoppable for your convenience! Just click any link below to get everything you need to complete this project without adding extra errands that add a lot of time to your day.
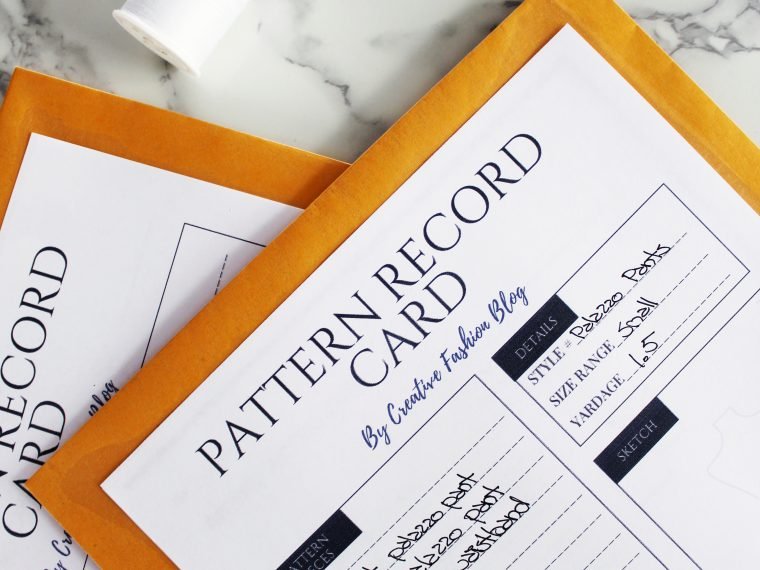
- The FREE Printable Pattern (Fill out the form above or at the bottom of this page to receive your printable copy.
- Basic Sewing Machine
- Tailor’s Chalk
- Yardstick
- 2 Yards Faux Suede Fabric
- Dressmaker Shears
- 2-inch Wide Black Elastic

How to Make A DIY Circle Skirt
Step 1: Cut Out Your FREE Full Circle Skirt Pattern
Your free pattern download comes with a 2″ measurement square in the lower right hand corner. To be sure your page prints in the right dimensions, just un-click the “fit to page” box in your printer settings and measure the box before cutting your pattern out.
Next, measure your waist (the smallest part of your back and abdomen about 9″ up from your hips) and cut along the corresponding line on your pattern.
Now, cut along the rectangular box that outlines the rest of your pattern. When you are done, your pattern should look like this.

Step 2: Fold Your Fabric & Place Your Pattern
This hack is where the sewing gods smile upon you.
Fold your fabric in half… and then fold it in half again. You should now have four layers, like a fabric sandwich. Place the tip of your pattern on the corner where all the folds meet (aka the donut hole of your future twirly masterpiece). This marks the top edge waistline you’ll follow for your circle skirt. When you cut it out, you’ll have a seamless DIY circle skirt that’s nearly complete.
Cut along the pattern lines carefully—don’t worry, the pattern already includes a ½ inch seam allowance and hem already so you don’t need to worry about altering your measurements once they are taken.
💡 Bonus Hack: Iron your fabric before cutting. It’s like meal prepping for sewing—it saves you chaos later.

Step 3: Decide How Long Your Circle Skirt Length Will Be
Here’s where you decide: Are you a maxi skirt queen or a mini skirt rebel?
Take your yardstick and tailors chalk out. Use your yard stick to measure out the length of your skirt. Find the length you want your skirt to be and mark with tailors chalk. Move it slowly around the waistline of your entire circle skirt until you’ve reached the other side.
I like to use a yardstick and not a tape measure for this step because it lays flat. It’s a completely straight line on it’s own when you are working with longer lengths. There’s nothing more frustrating than making a maxi skirt with a massively skewed hemline instead of the true shape of a circle. It can be impossible to fix especially when sections are accidentally cut too short! Use a yardstick to begin with, making a radius of the circle, and avoid the mistake completely.

Step 4: Create An Elastic Waistband
When you unfold your DIY circle skirt, you should have a good idea on what your skirt will look like when it’s complete. The next step is to make a simple elastic waist band with your own measurements to complete your project. To make an elastic waistband, just take a strip of 2-inch Wide Black Elastic and wrap it around your waist circumference. I like to make this a little snug. That way it stays put and won’t stretch out as I’m sewing the elastic to my suede fabric. Cut your elastic to this waist measurement and sew the ends together to create a complete circle. Boom. You now have a comfortable elastic waistband.

Step 5: Sew The Elastic To Your Circle Skirt & Hem
The last and final step is to pin your elastic to the radius of the waist circle and sew together. Lay your skirt flat and pin the elastic waistband to the raw edge of the waist opening. Gently stretch the elastic while sewing to make sure it fits evenly around the whole circle. If you are using a standard sewing machine, be sure you use a zig zag stitch (a close stitch-length creates a more uniform finish that stretches with the fabric.) or run it through a basic Serger.
Step 6: Hem the Bottom Edge
Almost done! Hem the bottom of the skirt by folding the raw edge under about ½ inch and sewing it down. You can use a double-fold hem if you’re feeling fancy, or a rolled hem for light fabrics.
Either way, once you’re done—cue the mirror twirls. You just made your very own circle skirt.

Circle Skirt Variations You’ll Want to Try Next
Once you’ve mastered the basic DIY circle skirt, you’re going to want to make, like, a dozen. Here are a few fun variations to get your creativity spinning:
✨ Double Circle Skirt
Twice the fabric, twice the drama. A double circle skirt flares even more dramatically—perfect for dance or special occasions.
🌓 Half Circle Skirt
A little less flare, a little more casual. Great for everyday wear or pairing with a tucked-in tee.
🖤 Play With Lengths
Just like I said before, you can go long or short and have dramatically different feels- that are all equally fun.
🌈 Color-blocked Circle Skirt
Use multiple fabrics or create wedges in different colors instead of one fabric to make a bold, rainbow-inspired design. Is a bit more sewing, but.. worth it for the color pops!
FAQ: Circle Skirt Pattern Tips for Beginners
How much fabric do I need for a circle skirt?
For a knee-length skirt, like I made above, 2 yards of fabric should be enough. If you’re going maxi, you may need 2.5–3 yards or more depending on your height and fabric width.
Can I make this without a sewing machine?
Technically yes, but it may take you a really, really long time to sew by hand. Also a sewing machine is highly recommended to keep the stitches even and strong, especially on stretchy fabrics. I recommend a sewing machine.
What’s the best fabric for a beginner?
Cotton or a light-to-medium-weight woven fabric is the easiest to cut and sew. The faux suede I used is also beginner-friendly and adds a luxe touch.
Final Thoughts: You’re Now the Circle Skirt Boss
If you’ve made it this far, congratulations—you’ve officially joined the circle skirt sewing club! There’s something so satisfying about making your own clothes, especially when they’re as versatile and flattering as this.
So go ahead: twirl, strut, brunch, party. Your closet just got a serious glow-up thanks to one little printable pattern and a few hours of your time.
I hope you guys really liked these step by step instructions on how to make a circle skirt! I’m excited to play around with this new circular skirt pattern some more. I’m dreaming of skirts to some old tops, create maxi skirts for spring, and more mini skirts for winter. If you have any questions while you are working on this (or any project from Creative Fashion Blog) please don’t hesitate to reach out! There are endless possibilities with this one. So many full-on vintage vibes to be made! I absolutely love hearing from you guys and am so excited to see your own circle skirts that you make with this wonderful pattern. If you like this pattern and want a short skirt, I think it would be super fun for you to also check out my socks tutorial! You can make some long socks to go with it HERE.
And remember—if you ever get stuck, have questions, or want to show off your skirt (yes, please!), hit me up in the comments or on IG. I love seeing your creations!
Print This Pattern!

Looking for another DIY skirt option? Try this tutorial:
Other FREE Printable Patterns You May Like:


Loved The DIY? Please Share It!