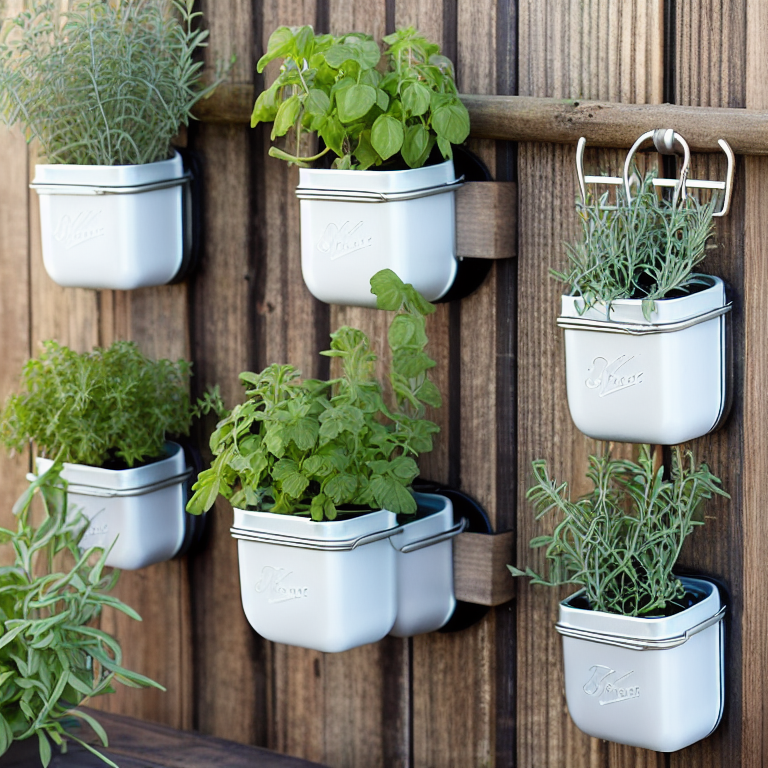
Growing your own herbs at home is one of the simplest ways to add fresh flavor to your cooking while also bringing a touch of green into your space. A DIY mason jar herb garden is perfect for small apartments, kitchen counters, or even as a charming gift. Mason jars are affordable, easy to find, and create a clean, rustic look that fits any decor style.
Unlike traditional pots, mason jars let you see the roots and soil, making it easy to monitor water levels and plant health. Plus, you can customize each jar with labels, paint, or twine for a personal touch. Whether you’re a beginner gardener or a seasoned plant lover, this project is simple, fun, and rewarding.
Why Choose a Mason Jar Herb Garden?
Mason jars are more than just pretty containers—they’re practical for indoor gardening. Their clear glass lets you see when the soil is dry, helping you avoid overwatering, which is one of the most common mistakes beginners make. Herbs like basil, parsley, mint, and chives thrive in small spaces, making them ideal for jar planting.
Another benefit is portability. You can move your jars around to catch the best sunlight or bring them to the kitchen while you cook. Plus, if you’re short on outdoor space, a mason jar herb garden lets you enjoy fresh herbs year-round without needing a backyard.
Materials You’ll Need
Before you start, gather all your supplies. You’ll need clean mason jars (pint or quart size works well), small pebbles or gravel for drainage, potting soil made for herbs, and herb seeds or small starter plants. You’ll also want labels, twine, or chalk paint if you want to decorate your jars.
Optional tools include a spray bottle for gentle watering, a small scoop for soil, and a sunny windowsill or grow light. Having everything ready before you begin will make the process smoother and more enjoyable.
Step 1: Prepare the Mason Jars
Start by washing your mason jars thoroughly with soap and water to remove any dust or residue. Dry them completely. Since mason jars don’t have drainage holes, you’ll need to create a drainage layer at the bottom to prevent root rot.
Add about an inch of small pebbles, gravel, or even marbles to the bottom of each jar. This layer will catch excess water and keep the roots from sitting in moisture. If you want extra protection, you can add a thin layer of activated charcoal on top of the pebbles to help filter water and prevent mold.
Step 2: Add Potting Soil
Fill each jar with potting soil, leaving about an inch of space at the top. Use a high-quality potting mix designed for herbs or vegetables, as it will have the right balance of nutrients and drainage. Avoid using garden soil, which can be too heavy and may contain pests.
Gently pat the soil down to remove air pockets, but don’t pack it too tightly. The soil should be firm enough to support the plant but loose enough for roots to grow easily.
Step 3: Plant Your Herbs
If you’re using seeds, plant them according to the packet instructions—usually a few seeds per jar, lightly covered with soil. If you’re using starter plants, carefully remove them from their nursery pots, loosen the roots, and place them in the jar. Fill in around the plant with more soil, pressing gently.
Water the soil lightly after planting. If you’re using seeds, keep the soil moist but not soggy until they sprout. For starter plants, water when the top inch of soil feels dry.
Step 4: Label and Decorate
Labeling your jars is both practical and fun. You can use chalkboard paint, wooden tags, or simple stickers to write the herb names. Adding decorative touches like twine, ribbon, or washi tape can make your herb garden a beautiful part of your kitchen decor.
If you want to get creative, check out these DIY custom planters ideas for more inspiration on personalizing your indoor garden space.
Step 5: Find the Perfect Spot
Herbs need plenty of sunlight to grow well—at least 6 hours a day. A sunny windowsill is ideal, but if your home doesn’t get much natural light, consider using a grow light. Rotate your jars every few days so all sides of the plants get even light.
Avoid placing jars near drafts, heating vents, or air conditioners, as extreme temperature changes can stress the plants. A stable, warm environment will help your herbs thrive.
Caring for Your Mason Jar Herb Garden
Watering is the most important part of caring for your herb garden. Since mason jars don’t drain, it’s easy to overwater. Use a spray bottle or a small watering can with a narrow spout to control the amount of water. Water only when the top inch of soil feels dry.
Trim your herbs regularly to encourage bushy growth and prevent them from becoming leggy. If you notice yellowing leaves or mold, reduce watering and increase air circulation around the jars.
For more tips on keeping your indoor plants healthy, you might enjoy this guide on creative ideas for personalizing your bullet journal, which includes plant care trackers and watering schedules.
Common Problems and Solutions
One common issue with mason jar herb gardens is overwatering. If you see water pooling at the bottom or the leaves turning yellow, cut back on watering and make sure the pebbles are providing enough drainage. Another problem is not enough light—herbs will grow tall and spindly if they’re reaching for light.
Pests like aphids or fungus gnats can sometimes appear. If you notice tiny flies or sticky leaves, try rinsing the plants gently and letting the soil dry out between waterings. You can also sprinkle cinnamon on the soil surface to deter fungus gnats.
Creative Ways to Use Your Fresh Herbs
Once your herbs are growing, you’ll have a steady supply for cooking, teas, and even homemade gifts. Fresh basil is perfect for pesto, mint makes refreshing mojitos, and rosemary adds flavor to roasted vegetables.
You can also dry extra herbs by hanging them upside down in a warm, dry place. Once dried, store them in small jars for use all year long. For more upcycling inspiration, check out these creative ways to upcycle old furniture and give it new life—perfect for creating unique plant stands or shelving for your herb garden.
Frequently Asked Questions (FAQ)
Can I use any type of mason jar for an herb garden?
Yes, but pint or quart-sized jars are best for most herbs. Smaller jars may not hold enough soil for healthy root growth.
Do mason jar herb gardens need drainage holes?
Not necessarily. By adding a layer of pebbles or gravel at the bottom, you can create a drainage system that prevents root rot.
How often should I water my herbs?
Water when the top inch of soil feels dry. This is usually every few days, but it depends on your home’s humidity and temperature.
What herbs grow best in mason jars?
Basil, parsley, mint, chives, thyme, and oregano are all great choices. Avoid herbs that need deep soil, like dill or cilantro.
Can I grow herbs indoors all year?
Yes! With enough light and proper care, you can enjoy fresh herbs indoors year-round.
What if my herbs get too big for the jar?
You can either transplant them to a larger pot or trim them back regularly to keep them manageable.
Conclusion
Creating a DIY mason jar herb garden is a simple, rewarding project that brings fresh flavors and greenery into your home. With just a few supplies and a little care, you can enjoy a steady supply of herbs for cooking, teas, and more. The best part is that you can customize your garden to fit your space and style, making it both practical and beautiful.
Whether you’re a beginner or an experienced gardener, this project is a fun way to connect with nature and enjoy the benefits of homegrown herbs. So grab some mason jars, pick your favorite herbs, and start planting today!
Leave a Reply